使用Strapi和Gatsby搭建一个blog网站
写在前面
最近研究了一下比较火Headless CMS,中文应该叫无头CMS?一段时间研究下来觉得这种产品设计理念非常先进,绝对会成为未来的主流,实际上ProcessWire CMS也有点相像,只是PW门槛更低,后台的业务内容和设计都是自己完成外它还提供了一套非常简单易用的Api和前端模板系统搭配使用,这是我最喜欢的这一点,在整个CMS框架体系下开发者非常自由,这是传统的CMS无法比拟的,无头CMS使我们回归到内容管理的本源,完全打破了设计优先的传统理念。
关于Strapi
Strapi是我最早接触的Headless CMS之一,18年的时候第一次接触了Strapi在本地搭建了一个实例,打开后台就对它一见钟情:在它身上看到了很多PW的影子,非常简洁但是又强大,但是由于当时是alpha版本所以仅作为学习研究使用,并没有用于生产环境。
喜欢Strapi的几个特性:
- 对多数据库的支持:sqlite3、mysql、postgresql、mongodb基本全部支持,PW只只是MYSQL
- 完全以内容优先,只生产数据,搭配前端框架(React,Vue)做到完全前后端分离,这种设计模式未来会成为主流
- 支持graphql
- nodejs架构
- 带有简易清爽的后台系统
当然它还有更多特点这里不一一叙述了。题外话有点多,下面正式切入正题吧
网上关于strapi+gatsby的实例教程有很多,不管是gatsby还是strapi都提供了入门的blog系统的搭建,但是实际上新手参照教程把整个流程跑下来也未必有几个能成功的,不管是git clone下来还是按照教程一步步来的,本文参考了strapi官网最新发布于2020年2月3日的《Build a static blog with Gatsby and Strapi》这篇教程,但是我也发现了这个内容的几个错误:
seo.js组件没有被合理使用,导致title为空,页面标题没有正确显示- 因为笔者使用了MongoDB作为后端数据库,所有数据记录的ID类型为
String,而article.js和category.js中GraphQL的查询参数类型的声明是Int:query ArticleQuery($id: Int!) - 与2的情况相同,articles.js中调取的
article.node.id,应该为article.node.strapiId
以上问题均在本文均被得到修正。
最后说一下我的开发环境吧:Windows10 + NodeJS v13.9.0 + MongoDB v4.1.8 + Gatsby 2.10.9 + Strapi 3.0.0-alpha.24.1
如上所述,如果你的环境和我的开发环境有出入请谨慎直接套用,特别注意上面说到的MongoDB数据库,如果是其它数据库以数字整型Int作为索引的情况肯定是不适用的,要做部分修改。
安装Strapi
创建项目目录
mkdir blog-strapi && cd blog-strapi
安装Strapi,参数说明:
- -
-quickstart是无需配置,使用sqlite3作为数据库快速安装,如果你想用其它数据库可以取消这个参数 --no-run安装完成后不需要启动,因为后面我们还需要安装插件
yarn create strapi-app backend --quickstart --no-run
安装完成后我们来安装一个很重要的graphql插件
yarn strapi install graphql
插件安装完成后用开发模式启动strapi
yarn develop
启动成功
yarn run v1.21.0
$ strapi develop

 Project information

┌────────────────────┬──────────────────────────────────────────────────┐
│ Time               │ Sat Mar 14 2020 22:49:52 GMT+0800 (China Standa… │
│ Launched in        │ 4080 ms                                          │
│ Environment        │ development                                      │
│ Process PID        │ 52656                                            │
│ Version            │ 3.0.0-beta.19.3 (node v13.9.0)                   │
└────────────────────┴──────────────────────────────────────────────────┘

 Actions available

Welcome back!
To manage your project �, go to the administration panel at:
http://localhost:1337/admin

To access the server ⚡️, go to:
http://localhost:1337
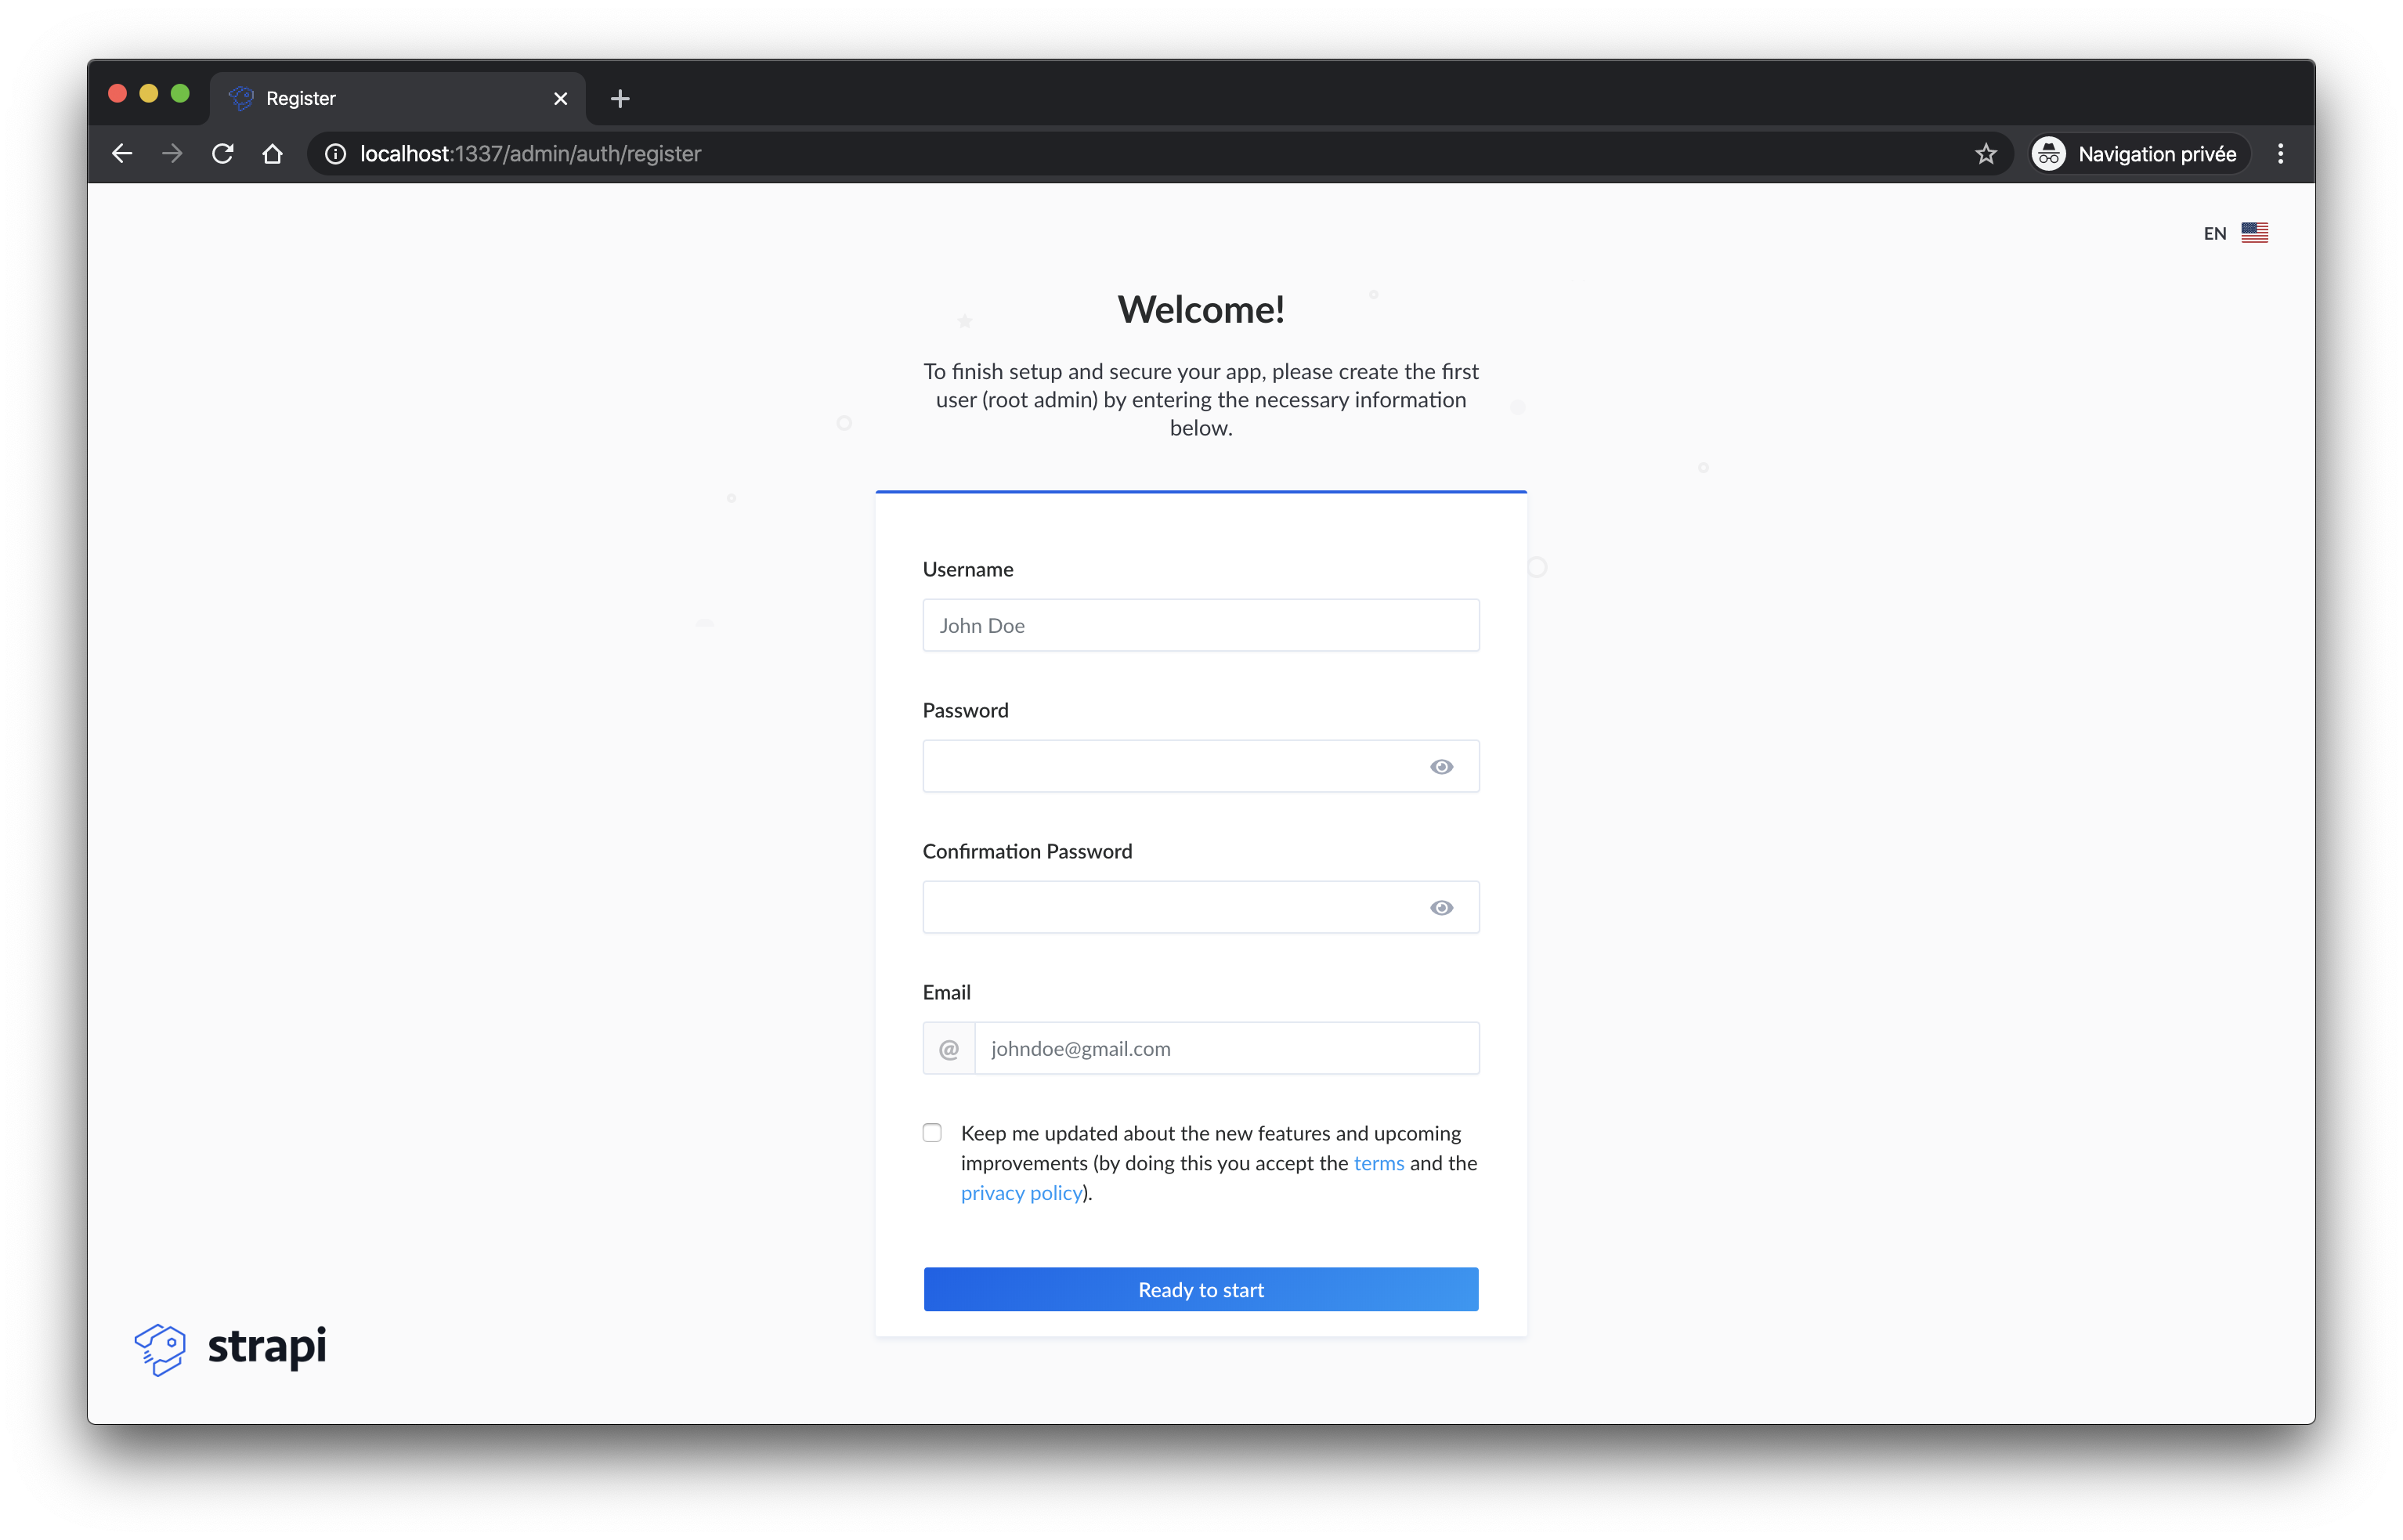
首次启动会弹出后台我们只需要按照要求填写账号密码即可。
安装Gatsby
Gatsby在Windows上安装可能坑比较多,比如我几天前就遇到了libpng-dev依赖缺失的问题,但是身为填坑专业户这不算什么。
安装gatsby-cli,如果你已经安装过可以直接忽略此步
npm install -g gatsby-cli
创建gatsby项目
gatsby new frontend
安装完毕后启动gatsby服务
cd frontend
gatsby develop
配置UIKit前端框架
本示例用了UIKit CSS框架,先需要修改src/components/seo.js文件meta={[]}种添加以下参数引入核心文件
...
link={[
  {
    rel: "stylesheet",
    href: "https://fonts.googleapis.com/css?family=Staatliches",
  },
  {
    rel: "stylesheet",
    href:
      "https://cdn.jsdelivr.net/npm/[email protected]/dist/css/uikit.min.css",
  },
]}
script={[
  {
    src:
      "https://cdnjs.cloudflare.com/ajax/libs/uikit/3.2.0/js/uikit.min.js",
  },
  {
    src:
      "https://cdn.jsdelivr.net/npm/[email protected]/dist/js/uikit-icons.min.js",
  },
  {
    src: "https://cdnjs.cloudflare.com/ajax/libs/uikit/3.2.0/js/uikit.js",
  },
]}
...完整的src/components/seo.js文件
import React from "react"
import PropTypes from "prop-types"
import Helmet from "react-helmet"
import { useStaticQuery, graphql } from "gatsby"

function SEO({ description, lang, meta, title }) {
  const { site } = useStaticQuery(
    graphql`
      query {
        site {
          siteMetadata {
            title
            description
            author
          }
        }
      }
    `
  )

  const metaDescription = description || site.siteMetadata.description

  const metaTitle = title || site.siteMetadata.title

  return (
    <Helmet
      htmlAttributes={{
        lang,
      }}

      title={metaTitle}

      titleTemplate={`%s | ${site.siteMetadata.title}`}

      meta={[
        {
          name: `description`,
          content: metaDescription,
        },
        {
          property: `og:title`,
          content: metaTitle,
        },
        {
          property: `og:description`,
          content: metaDescription,
        },
        {
          property: `og:type`,
          content: `website`,
        },
        {
          name: `twitter:card`,
          content: `summary`,
        },
        {
          name: `twitter:creator`,
          content: site.siteMetadata.author,
        },
        {
          name: `twitter:title`,
          content: metaTitle,
        },
        {
          name: `twitter:description`,
          content: metaDescription,
        },
      ].concat(meta)}


      //custom styles
      link={[
        {
          rel: "stylesheet",
          href: "https://fonts.googleapis.com/css?family=Staatliches",
        },
        {
          rel: "stylesheet",
          href:
            "https://cdn.jsdelivr.net/npm/[email protected]/dist/css/uikit.min.css",
        },
      ]}

      //custom scripts
      script={[
        {
          src:
            "https://cdnjs.cloudflare.com/ajax/libs/uikit/3.2.0/js/uikit.min.js",
        },
        {
          src:
            "https://cdn.jsdelivr.net/npm/[email protected]/dist/js/uikit-icons.min.js",
        },
        {
          src: "https://cdnjs.cloudflare.com/ajax/libs/uikit/3.2.0/js/uikit.js",
        },
      ]}

    />
  )
}

SEO.defaultProps = {
  lang: `en`,
  meta: [],
  description: ``,
}

SEO.propTypes = {
  description: PropTypes.string,
  lang: PropTypes.string,
  meta: PropTypes.arrayOf(PropTypes.object),
  title: PropTypes.string.isRequired,
}

export default SEO
接下来创建我们自定义的css样式,创建文件 src/assets/css/main.css
a {
  text-decoration: none !important;
}

h1 {
  font-family: Staatliches !important;
  font-size: 120px !important;
}

#category {
  font-family: Staatliches !important;
  font-weight: 500 !important;
}

#title {
  letter-spacing: 0.4px !important;
  font-size: 22px !important;
  font-size: 1.375rem !important;
  line-height: 1.13636 !important;
}

#banner {
  margin: 20px !important;
  height: 800px !important;
}

#editor {
  font-size: 16px !important;
  font-size: 1rem !important;
  line-height: 1.75 !important;
}

.uk-navbar-container {
  background: #fff !important;
  font-family: Staatliches !important;
}

img:hover {
  opacity: 1 !important;
  transition: opacity 0.25s cubic-bezier(0.39, 0.575, 0.565, 1) !important;
}
配置gatsby数据接口
为gatsby安装gatsby-source-strapi插件
yarn add gatsby-source-strapi
安装完成后修改gatsby根目录(frontend)下创建文件.env.development并输入以下内容
API_URL="http://localhost:1337"
这时候你可能注意到了,这个文件用于配置strapi的数据接口的,注意端口号后面不要带斜杠/。
接下来我们修改统目录下的gatsby-config.js文件内容
require("dotenv").config({
  path: `.env.${process.env.NODE_ENV}`,
})

module.exports = {
  siteMetadata: {
    title: "My super blog",
    description: "Gatsby blog with Strapi",
    author: "Strapi team",
  },
  plugins: [
    "gatsby-plugin-react-helmet",
    {
      resolve: `gatsby-source-filesystem`,
      options: {
        name: `images`,
        path: `${__dirname}/src/images`,
      },
    },
    {
      resolve: "gatsby-source-strapi",
      options: {
        apiURL: process.env.API_URL || "http://localhost:1337",
        contentTypes: [
          // List of the Content Types you want to be able to request from Gatsby.
          "article",
          "category",
        ],
        queryLimit: 1000,
      },
    },
    "gatsby-transformer-sharp",
    "gatsby-plugin-sharp",
    {
      resolve: `gatsby-plugin-manifest`,
      options: {
        name: "gatsby-starter-default",
        short_name: "starter",
        start_url: "/",
        background_color: "#663399",
        theme_color: "#663399",
        display: "minimal-ui",
      },
    },
    "gatsby-plugin-offline",
  ],
}
至此,前端数据接口已经准备完毕,进入下一章strapi的数据准备。
准备后端数据
为strapi设计数据结构并准备数据
登陆strapi后台,创建一个名为article的content type
注意在新版strapi中创建content type的链接名称是Create new collection type,我们点击它然后在Display name里面输入article
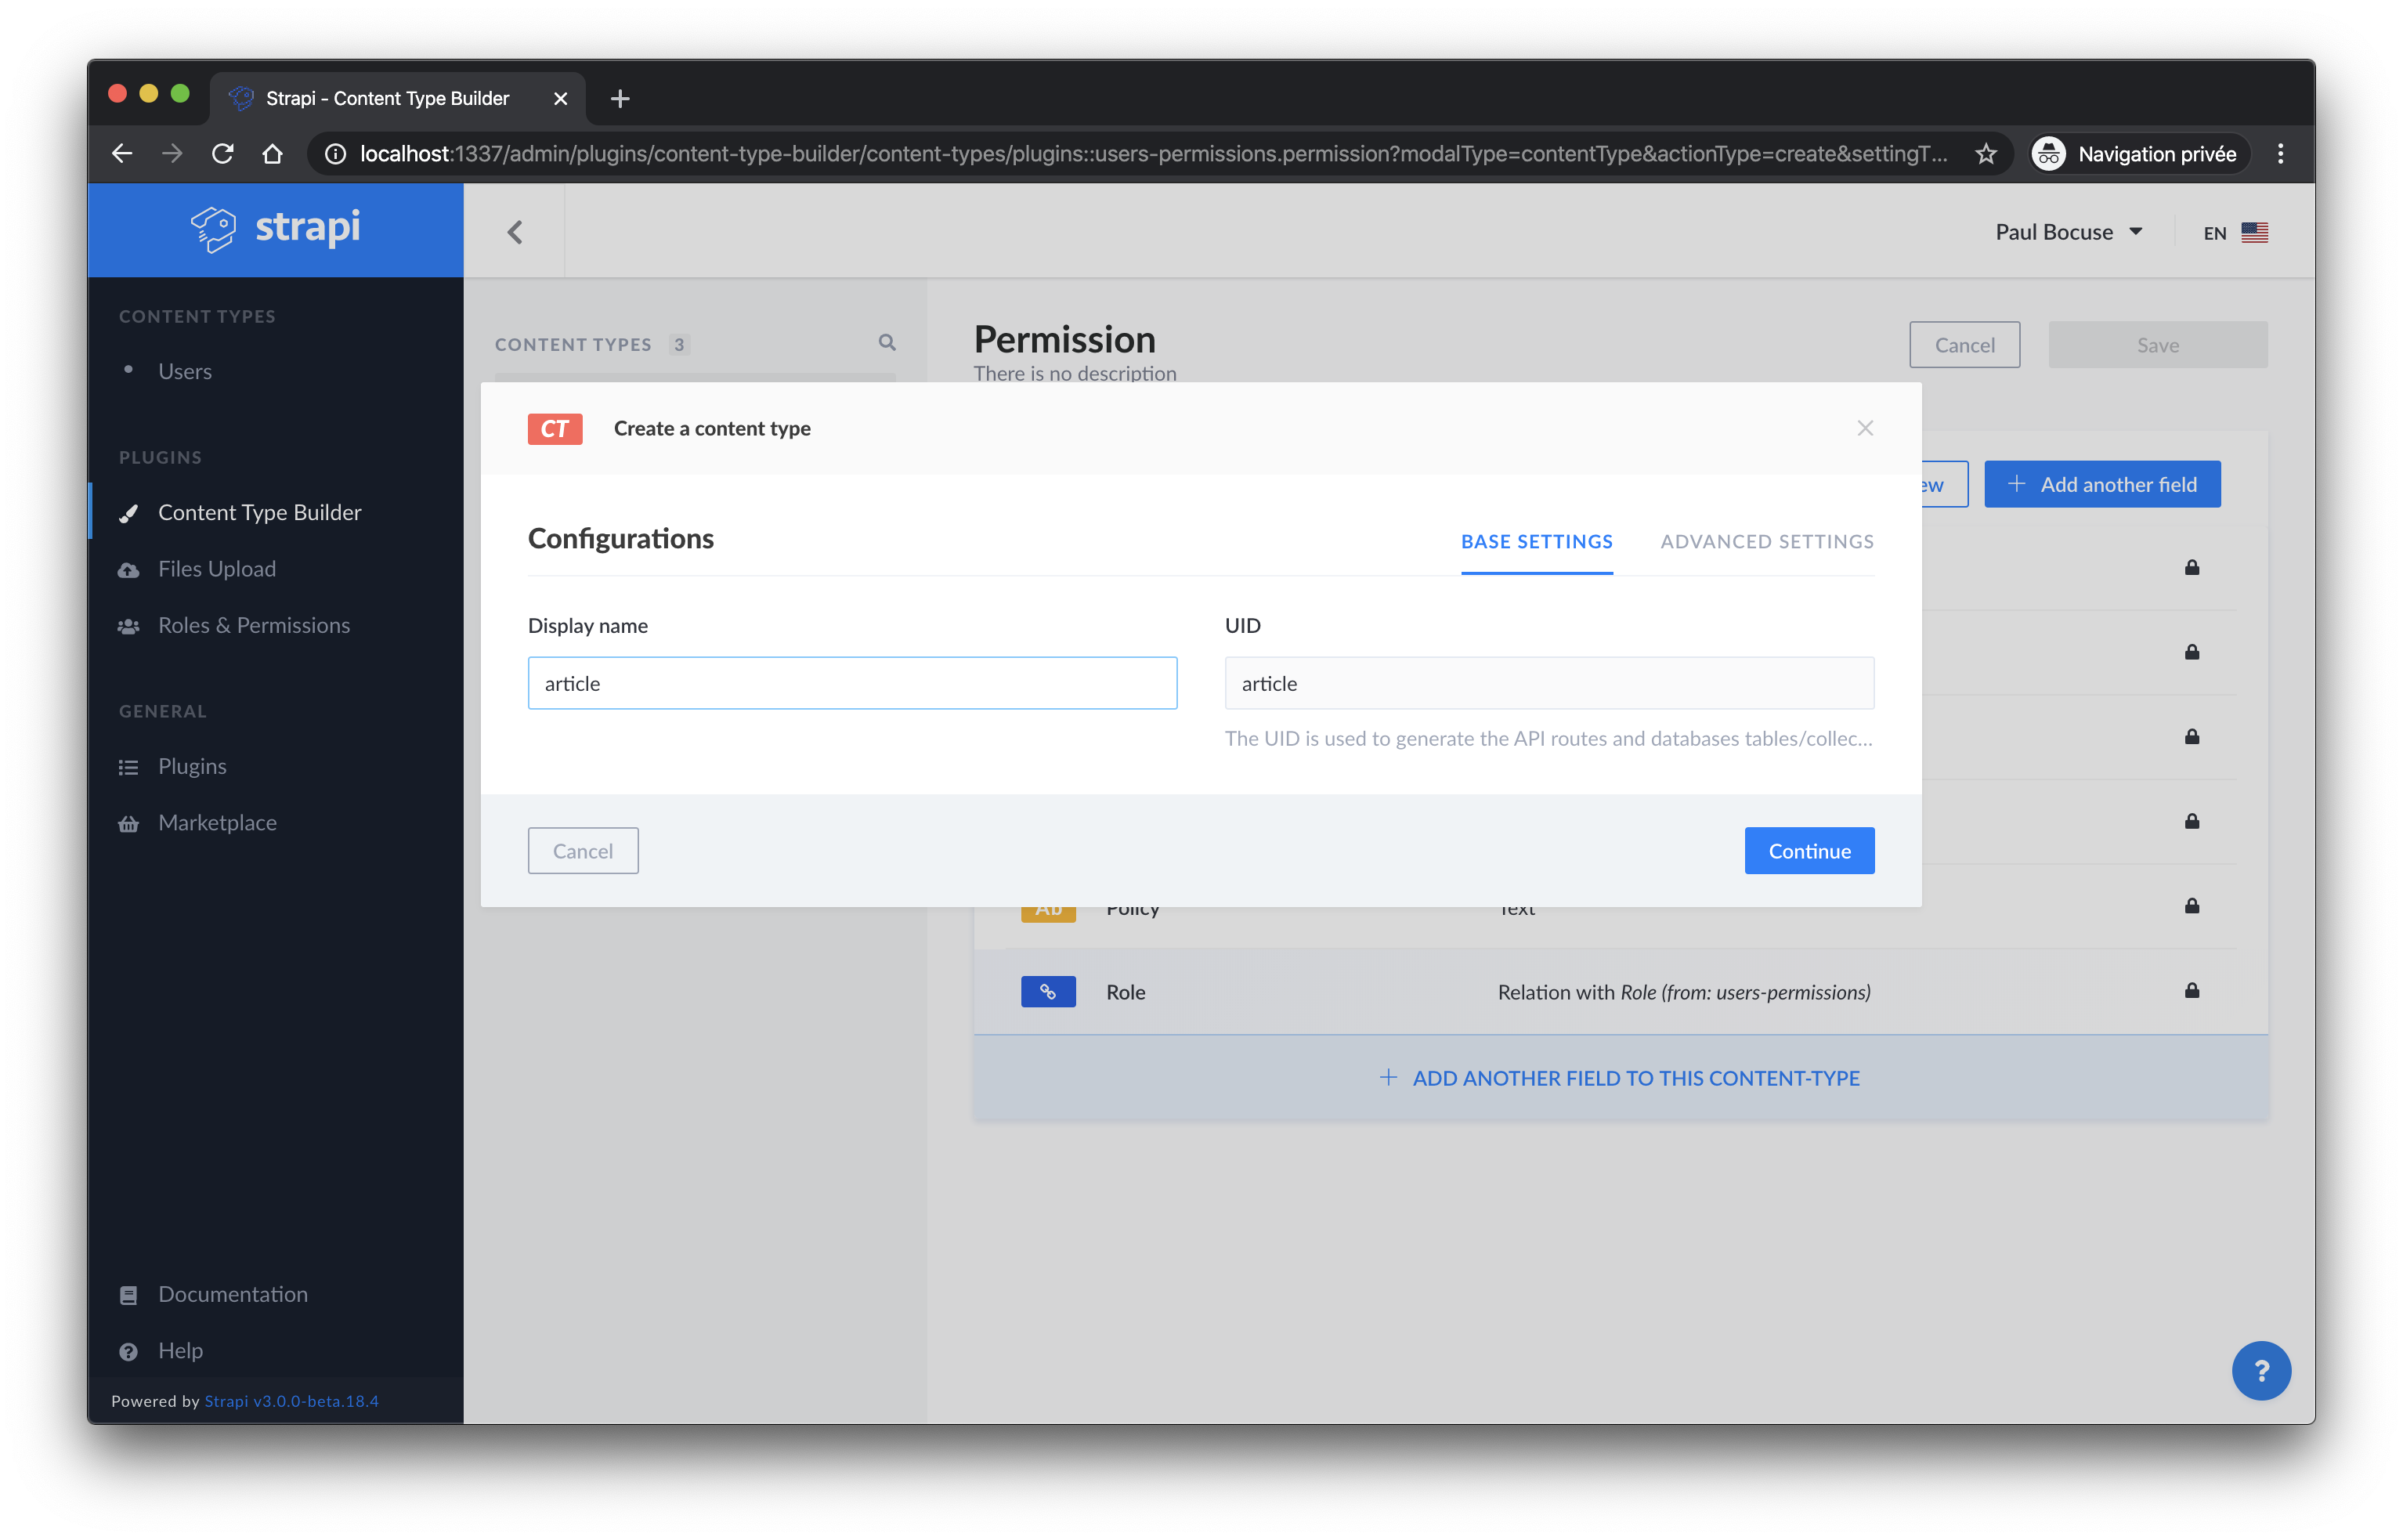
接下来准备为article创建字段

需要创建的字段清单
title类型:Text (required)content类型:Rich Text (required)image类型:Media (Single image) and (required)published_at类型:date (required)
完成后别忘记点击save保存,接下来需要配置访问权限
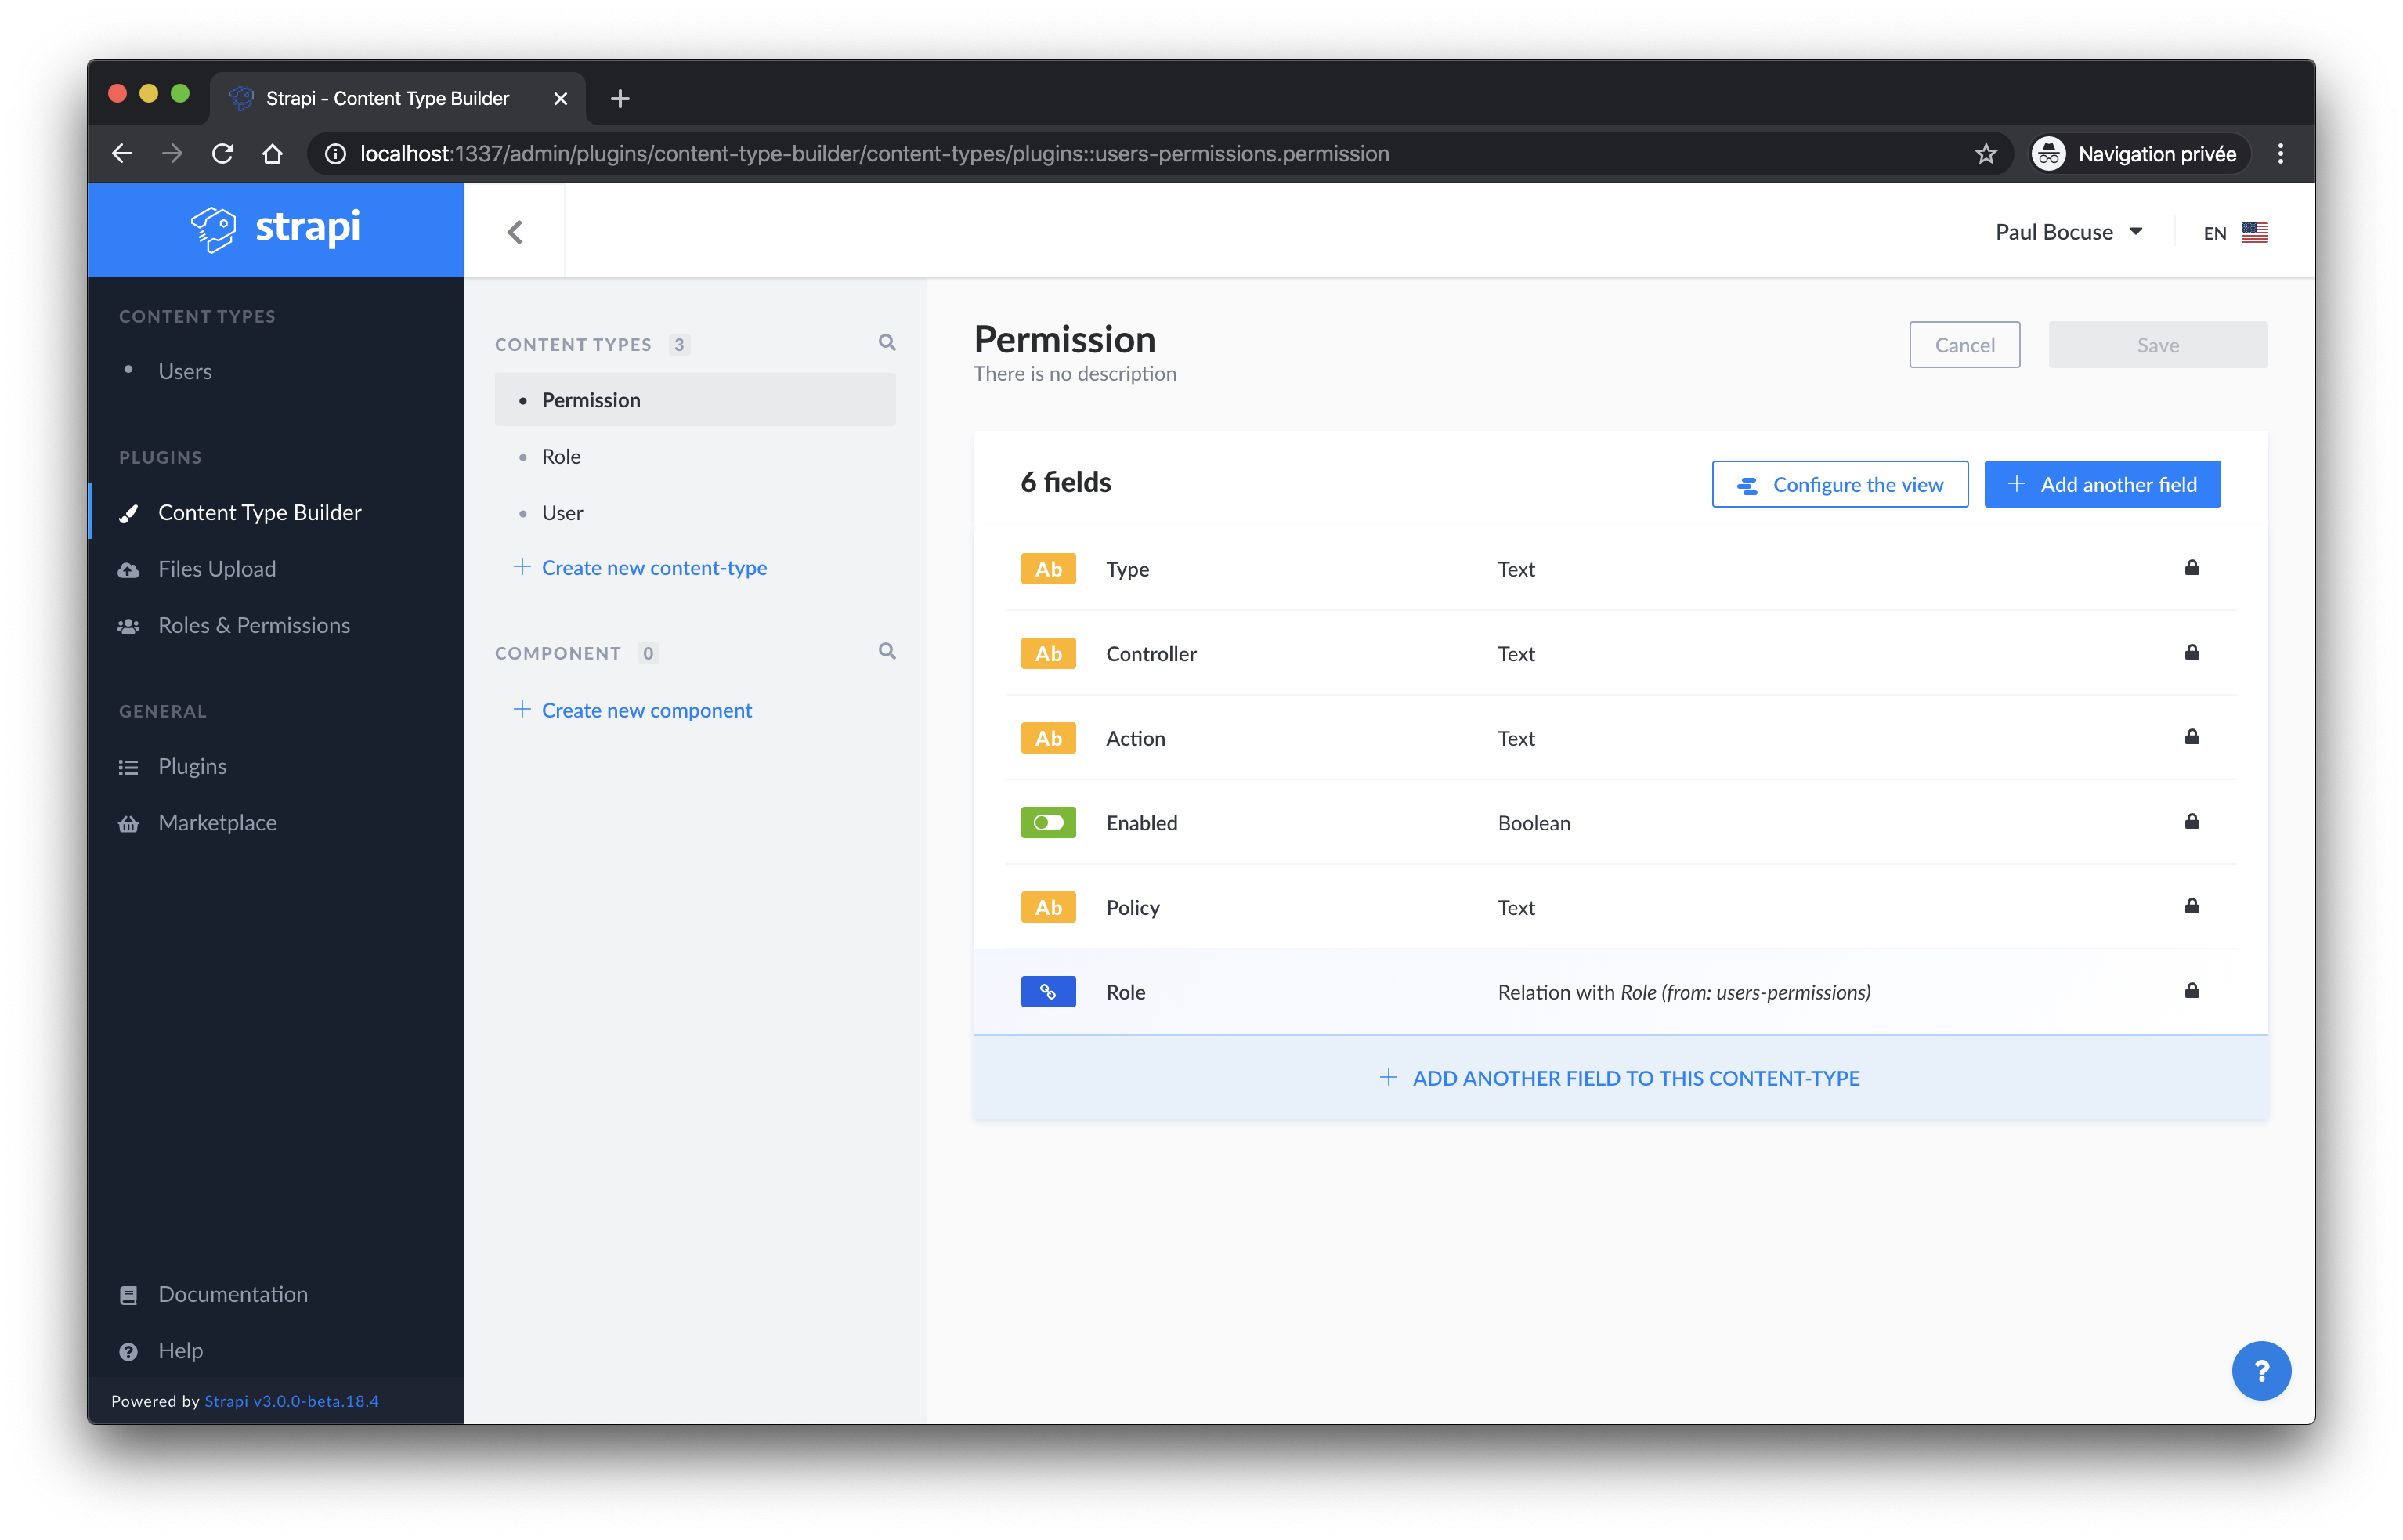
点击 Roles & Permission 并找到 public然后把find 和 findone前面的勾勾上然后点击Save保存。

接下来我们添加一些数据
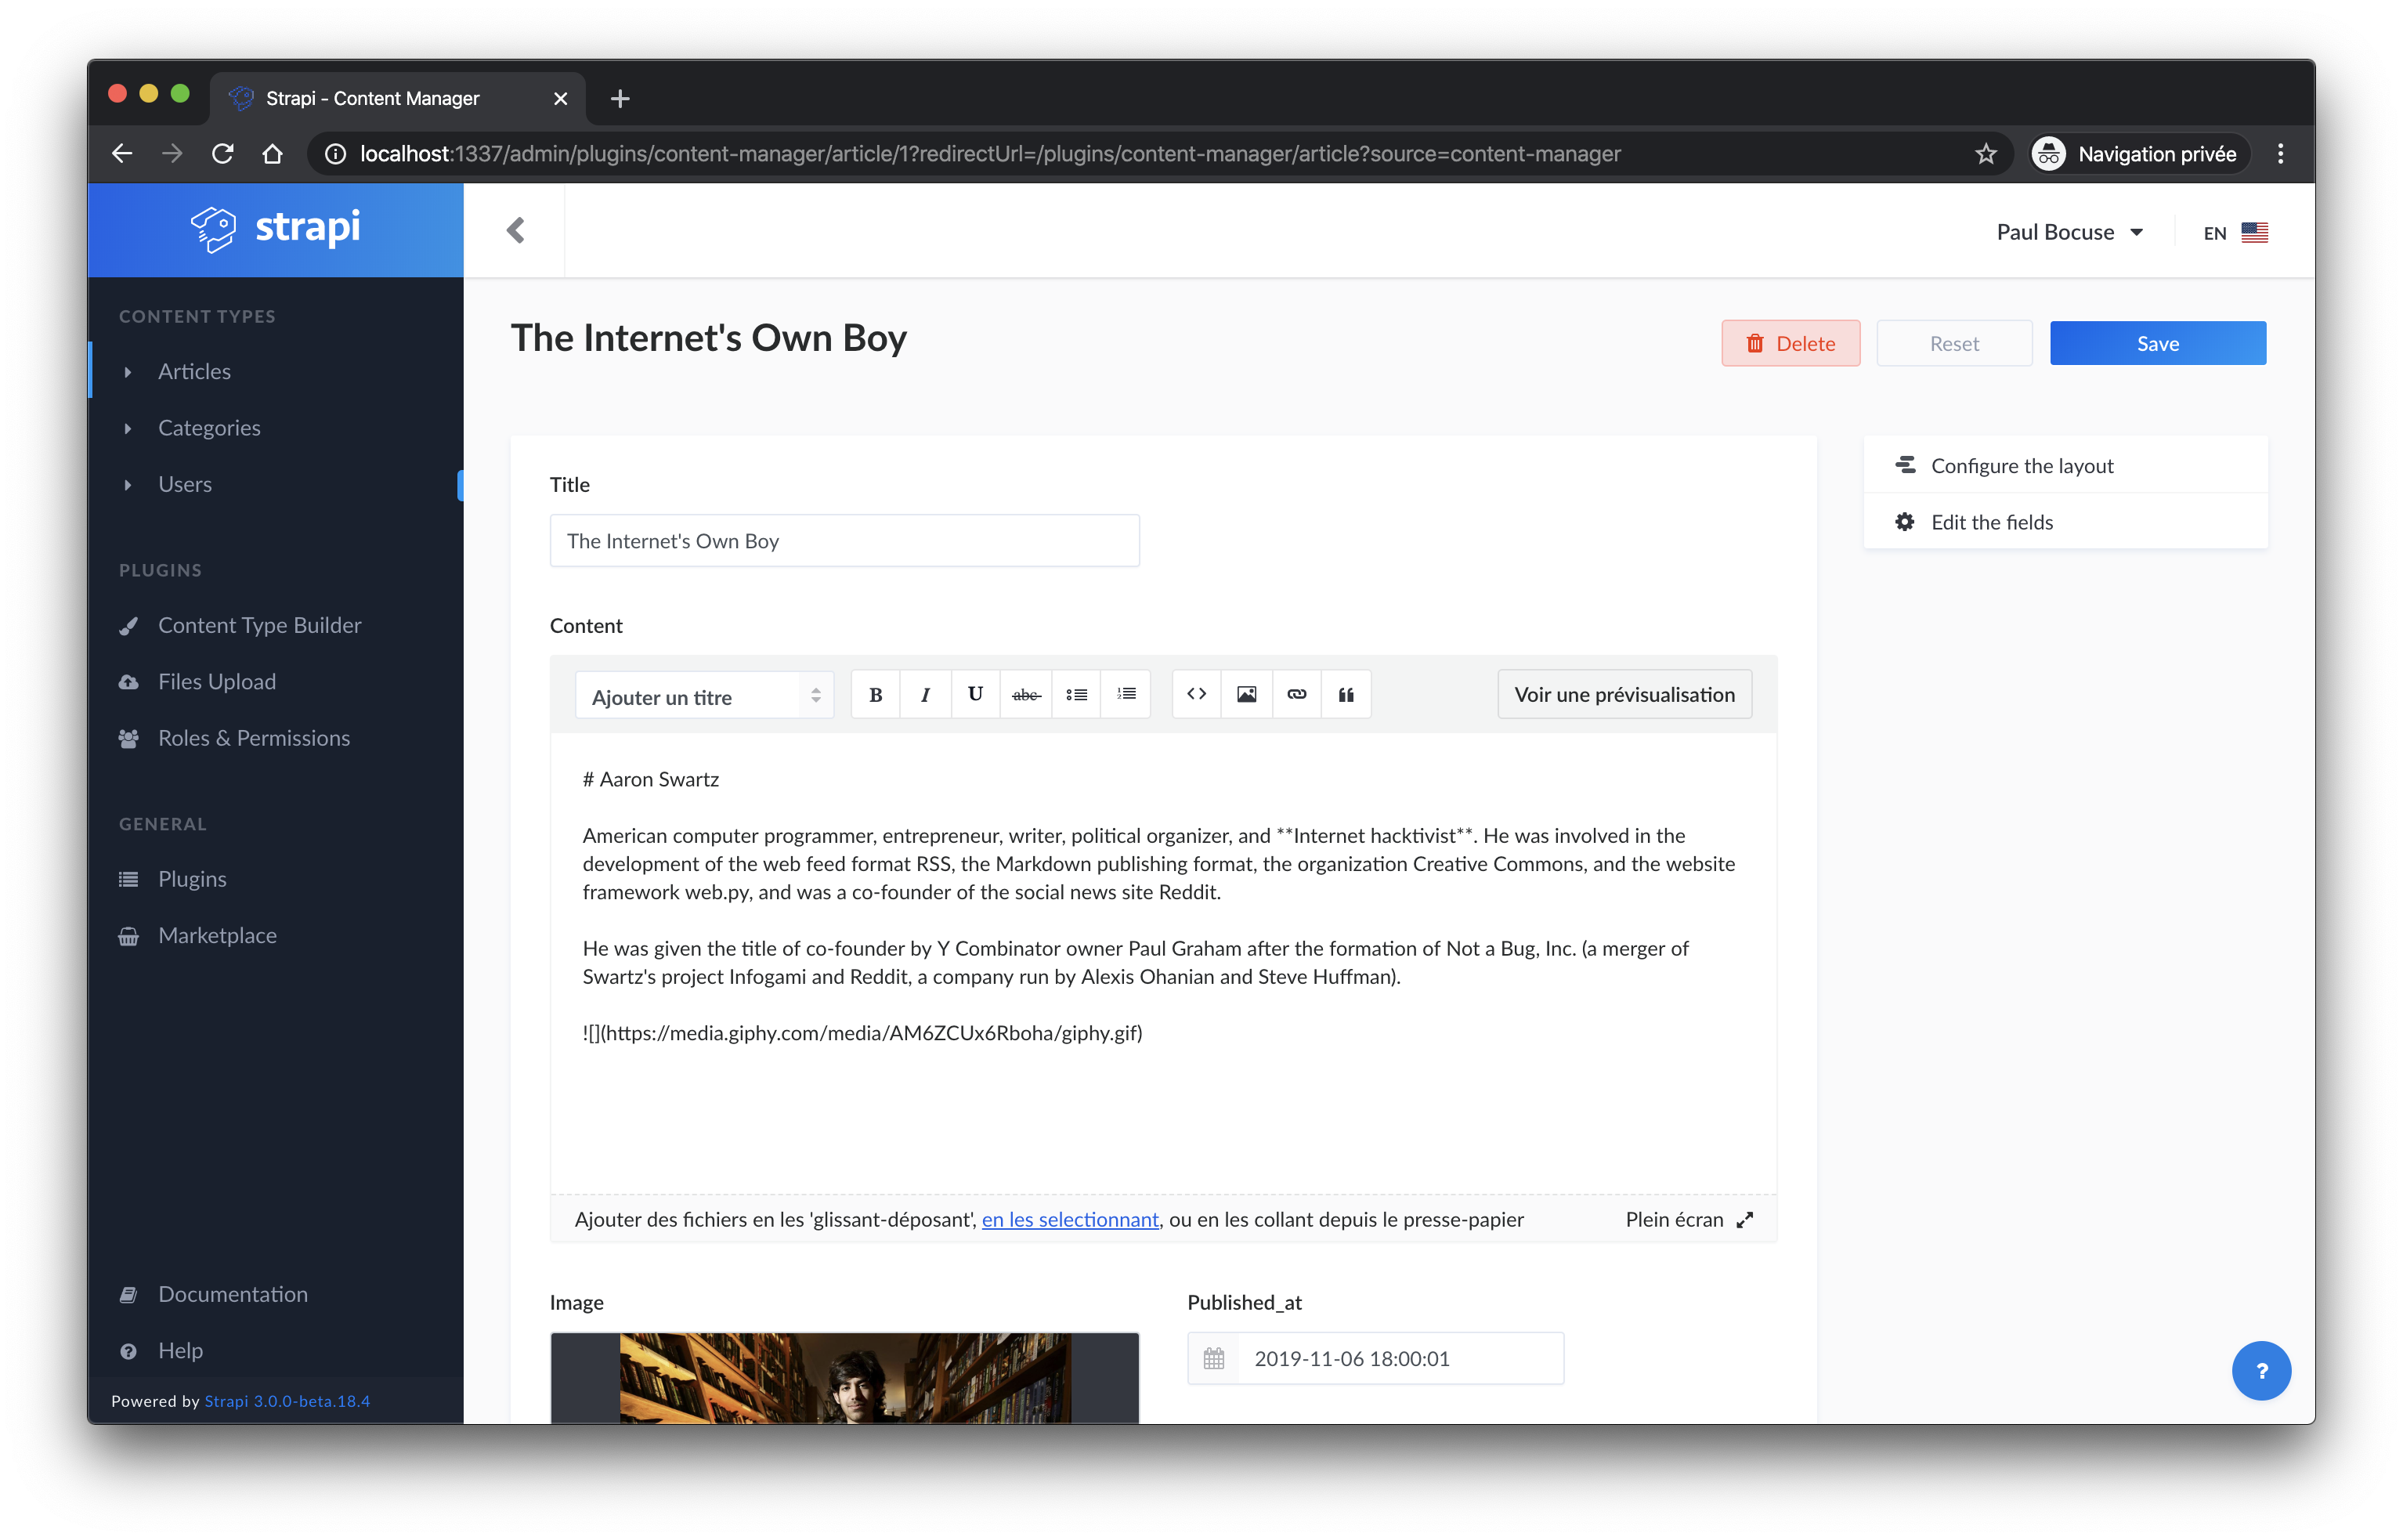
在添加完内容后我们可以通过访问地址http://localhost:1337/articles看到刚刚我们添加的数据,只是数据格式为json。此外,我们还可以通过http://localhost:1337/graphql来访问graphql后台。

分类的创建
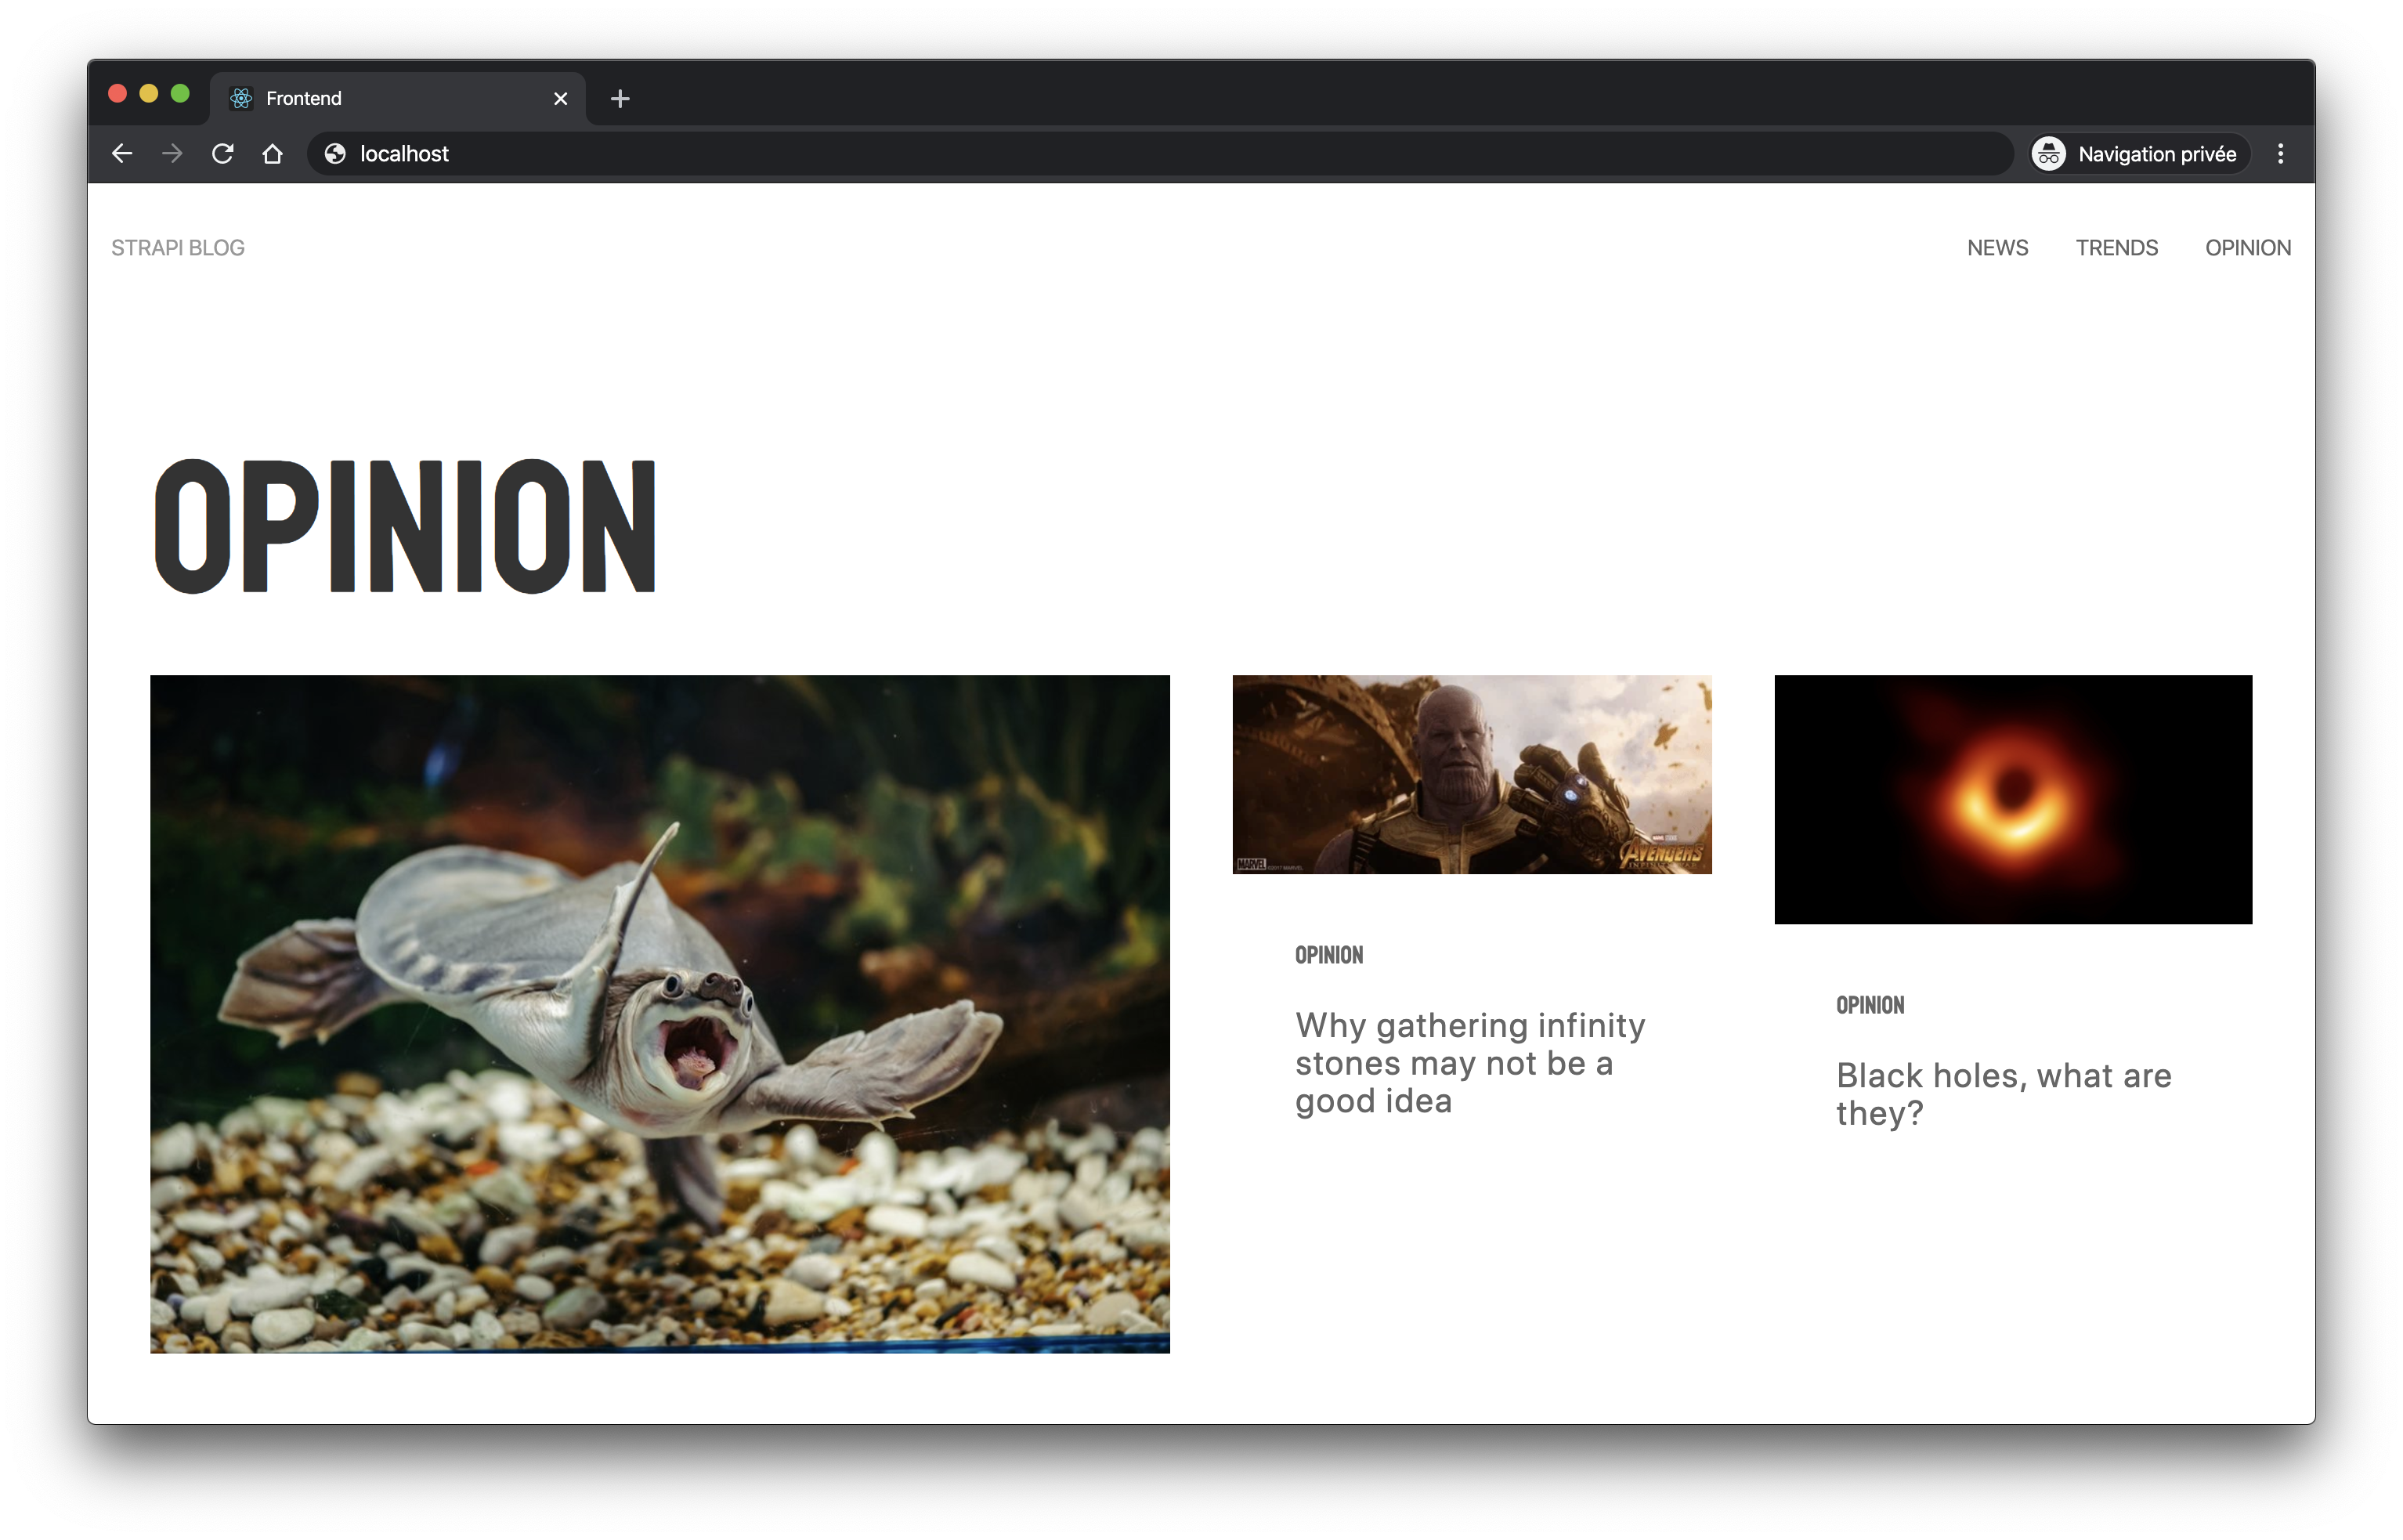
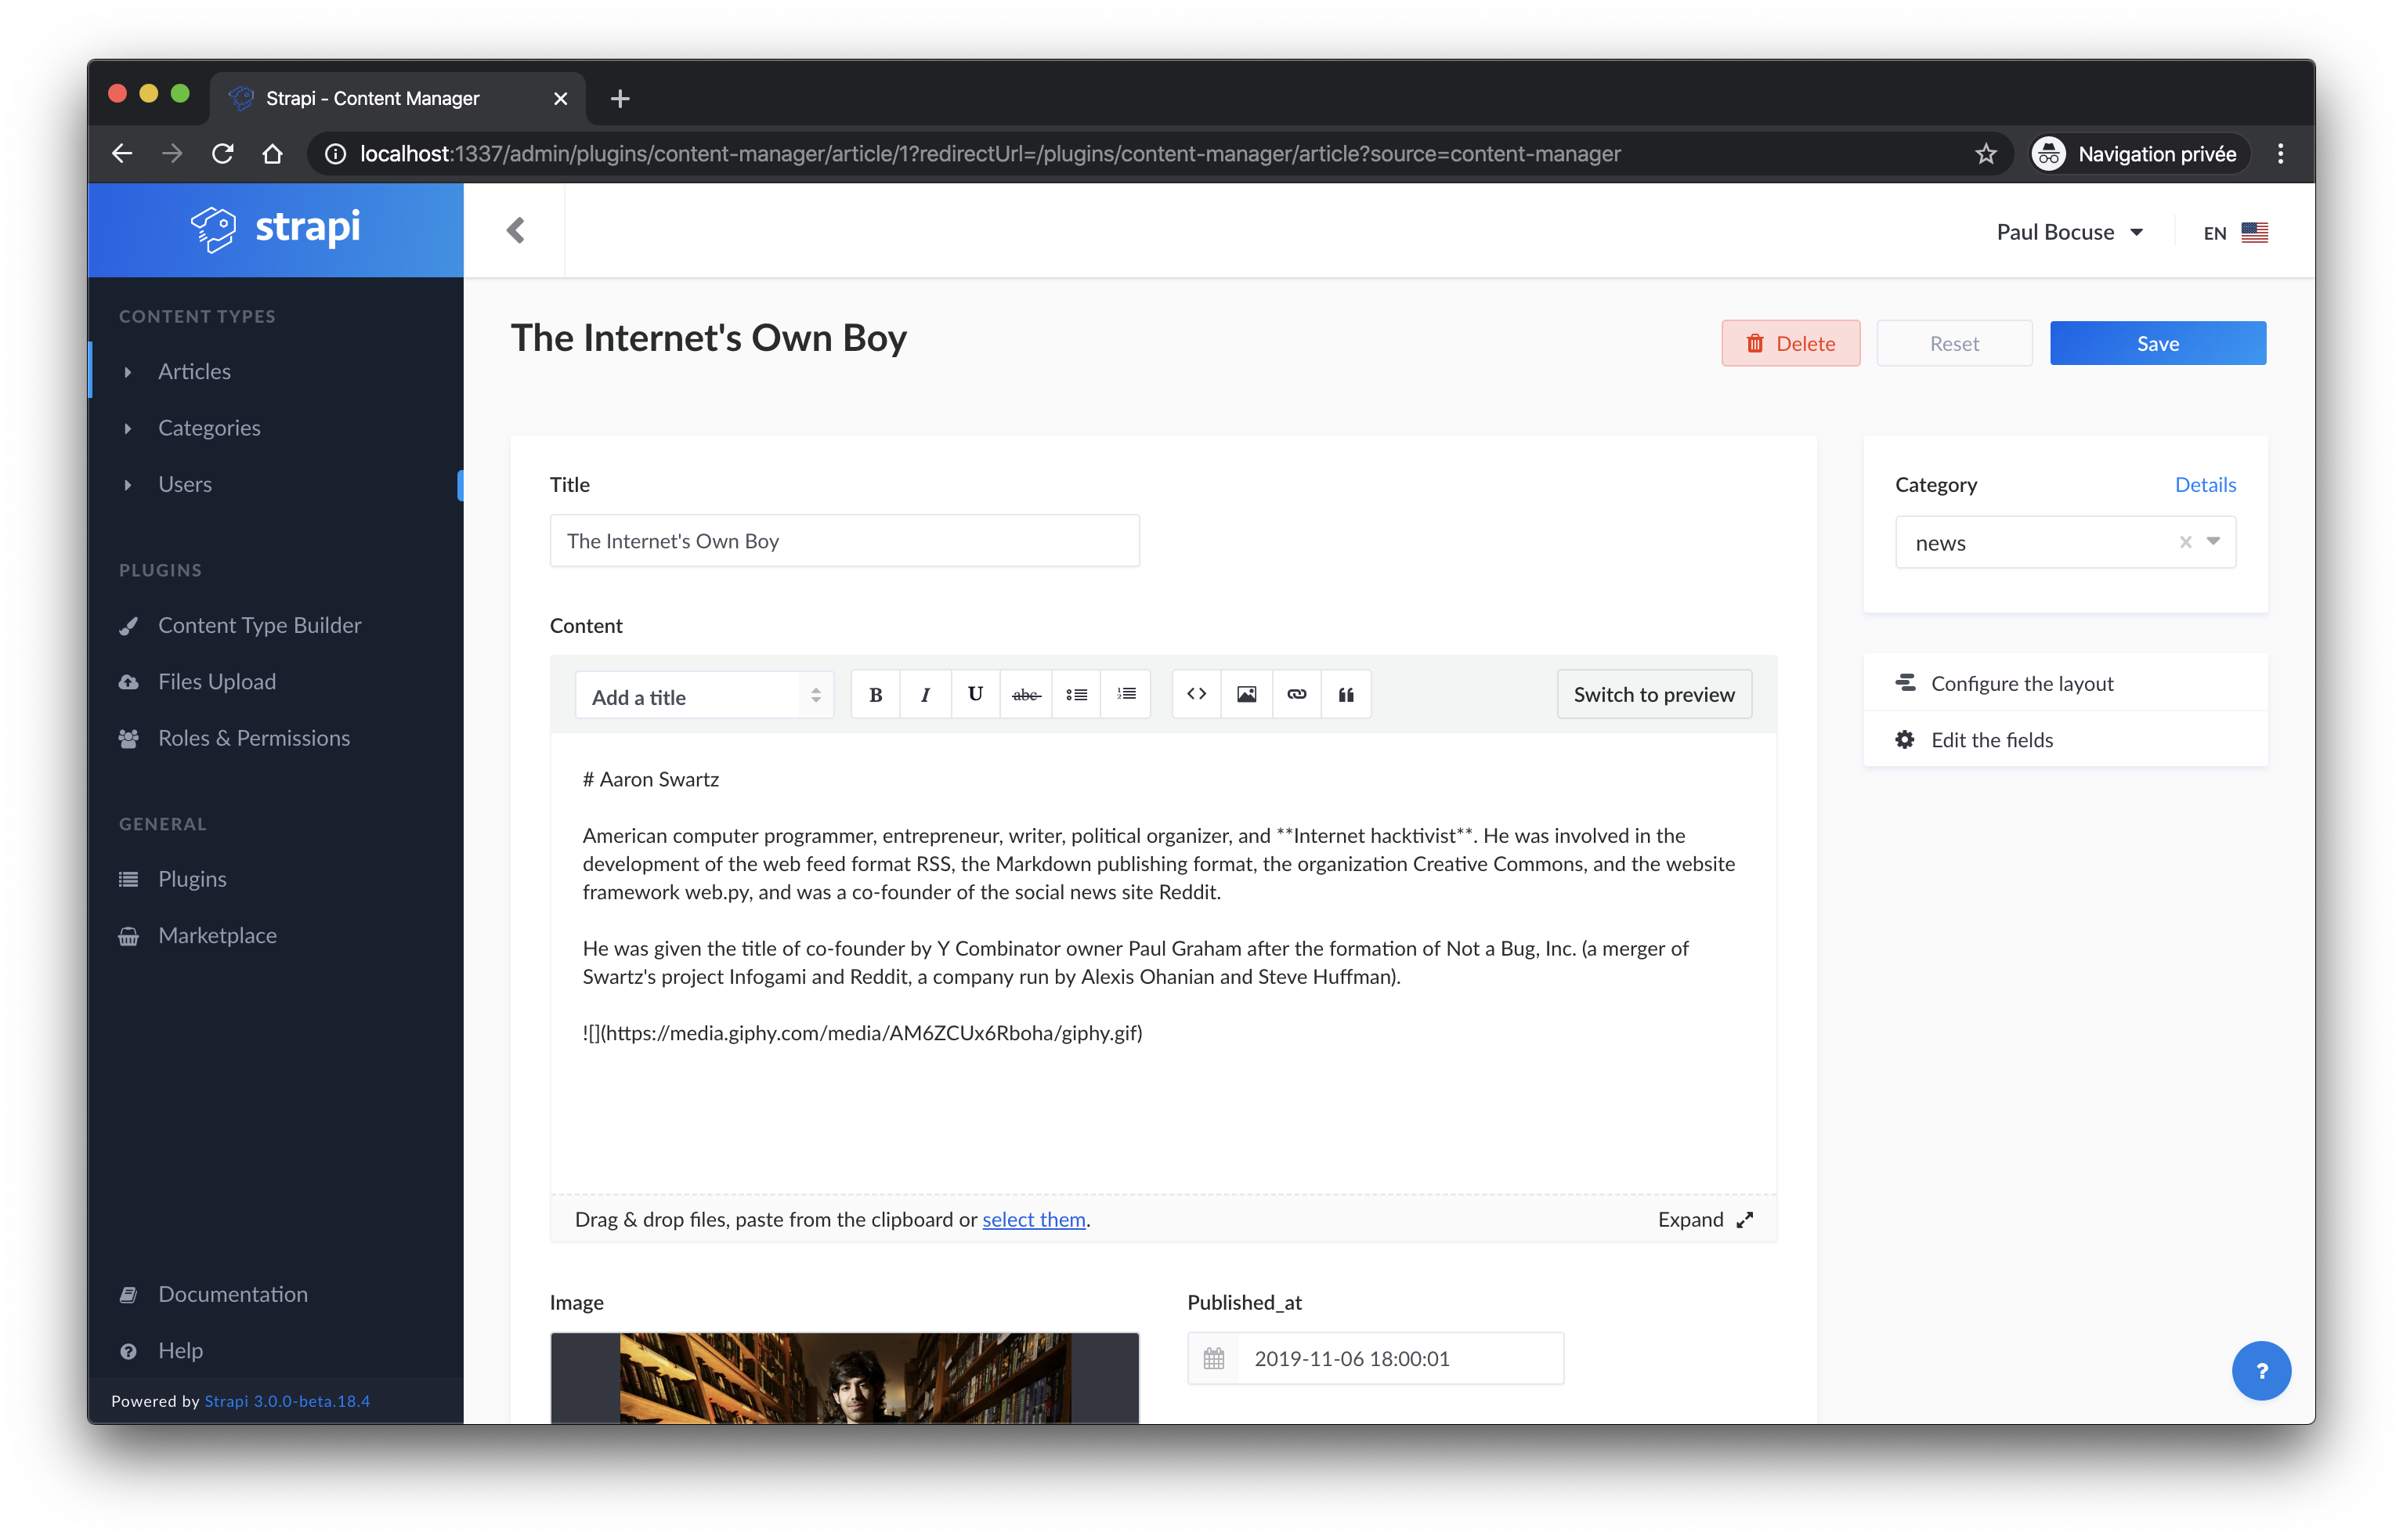
有了blog内容了,但是我们还少了分类设置,接下来我们需要
- 创建一个名为
category的content type并创建一个字段名为name类型为Text,点击Save保存。 - 在
articlecontent type中创建一个名为category类型为Relation的新字段,注意说起来可能有点绕,article和category的关系是一对多(一个分类下有多个文章):Category has many Articles,做过关系型数据库设计的同学应该比较清楚,如果弄不明白就参考下图设置即可。

接下来依旧需要配置访问权限,点击 Roles & Permission 找到 public 然后找到category下面的 find 和 findone 并勾上,最后Save保存。
这时候去修改或创建一篇文章你会发现右侧有个分类的选项了,注意使用前需要事先添加好分类数据。
到了这一步我们已经把后端数据部分准备的差不多了,接下来我们需要去配置前端的数据展示。
前端数据的展示
为Gatsby设计数据展示的模板
在进入下一步操作前先删除掉创建gatsby默认项目带来的无用文件:
rm src/components/header.js src/components/layout.css src/components/image.js src/pages/page-2.js
需要了解的一些React组件基础知识
我们先更新两个文件pages/index.js 和 components/layout.js
pages/index.js 该文件为app的默认启动页(主页),在下面代码我们可以看到从components中导入了Layout组件和css文件
import React from "react"

import Layout from "../components/layout"

import "../assets/css/main.css"

const IndexPage = () => <Layout></Layout>

export default IndexPage
components/layout.js
import React from "react"
import PropTypes from "prop-types"

import Seo from "./seo"

const Layout = ({ children }) => {
  return (
    <>
      <Seo />
      <main>{children}</main>
    </>
  )
}

Layout.propTypes = {
  children: PropTypes.node.isRequired,
}

export default Layout
Gatsby中的布局组件是什么?
这些组件用来作为你网站公共区域的部分,比如页面头部和尾部,还有常见的侧边栏和导航菜单等等,有了组件引入的概念后我们将这些区域做成组件在不同的页面直接引入使用即可。
创建导航条组件
这个组件的功能很明确,就是在页面头部显示所有分类,创建文件./src/components/nav.js并添加以下内容
import React from "react"
import { Link, StaticQuery, graphql } from "gatsby"

const Nav = () => (
  <div>
    <div>
      <nav className="uk-navbar-container" data-uk-navbar>
        <div className="uk-navbar-left">
          <ul className="uk-navbar-nav">
            <li>
              <Link to="/">Strapi Blog</Link>
            </li>
          </ul>
        </div>

        <div className="uk-navbar-right">
          <ul className="uk-navbar-nav">
            <StaticQuery
              query={graphql`
                query {
                  allStrapiCategory {
                    edges {
                      node {
                        strapiId
                        name
                      }
                    }
                  }
                }
              `}
              render={data =>
                data.allStrapiCategory.edges.map((category, i) => {
                  return (
                    <li key={category.node.strapiId}>
                      <Link to={`/category/${category.node.strapiId}`}>
                        {category.node.name}
                      </Link>
                    </li>
                  )
                })
              }
            />
          </ul>
        </div>
      </nav>
    </div>
  </div>
)

export default Nav
这段代码是什么意思?
Gatsby v2 中添加了StaticQuery,一种全新的API可以让组件获取GraphQL query的数据。
query {
  allStrapiCategory {
    edges {
      node {
        strapiId
        name
      }
    }
  }
}
这是一段最简单的GraphQL Query,它可以从strapi中查询所有分类数据,这时StaticQuery将数据记录生成html
render={data =>
  data.allStrapiCategory.edges.map((category, i) => {
    return (
      <li key={category.node.strapiId}>
        <Link to={`/category/${category.node.strapiId}`}>
          {category.node.name}
        </Link>
      </li>
    )
  })
}此时我们在Layout布局组件中导入刚刚创建的Nav导航组件,修改components/layout.js
import React from "react"
import PropTypes from "prop-types"
import Nav from "./nav"
import Seo from "./seo"
const Layout = ({ children, title}) => {
return (
<>
<Seo title={title} />
<Nav />
<main>{children}</main>
</>
)
}
Layout.propTypes = {
children: PropTypes.node.isRequired,
}
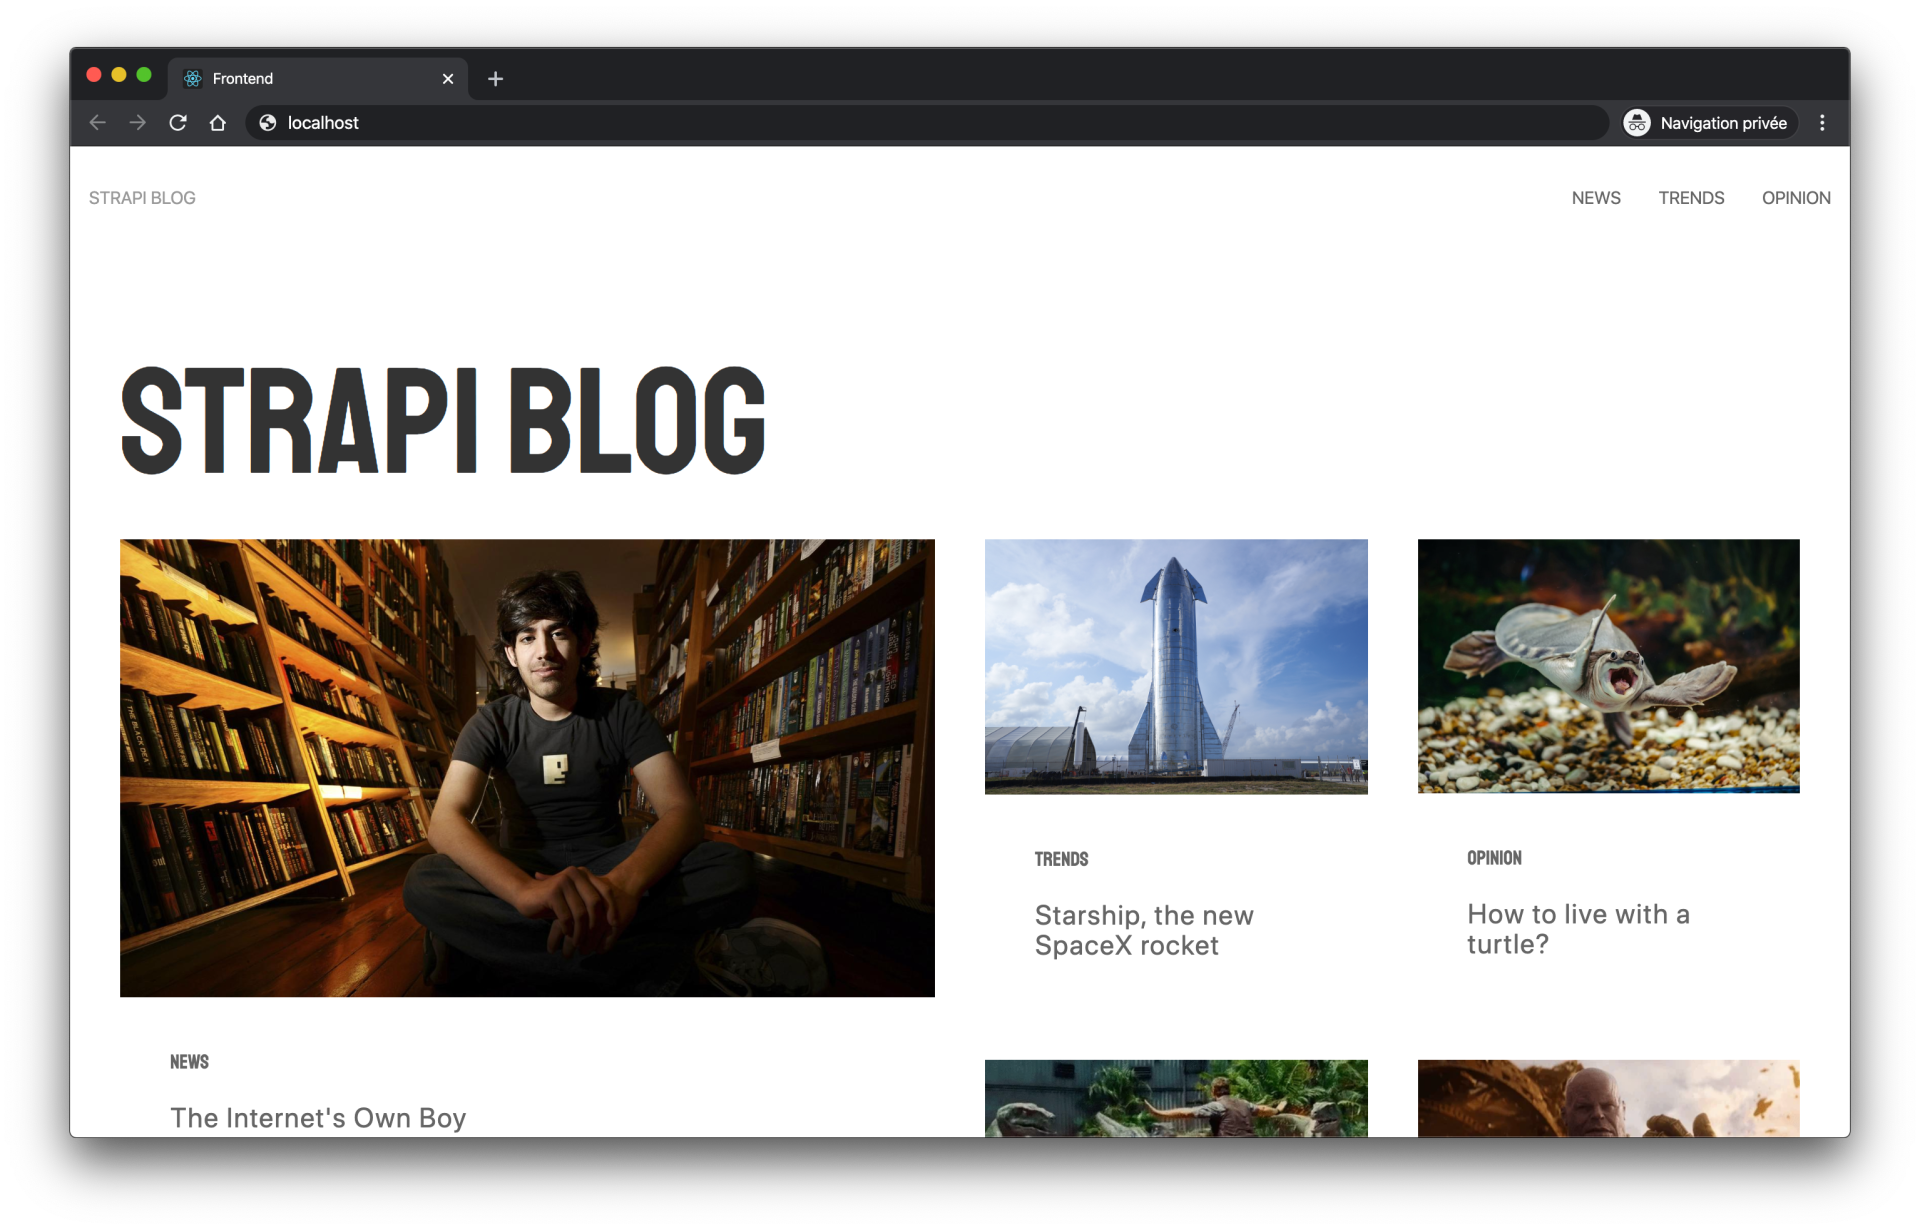
export default Layout 这时候我们刷新页面可以看到分类信息被调用出来了

创建Articles组件
在首页要显示所有我们添加的文章我们需要创建一个组件来完成此功能,修改文件pages/index.js
import React from "react"
import { StaticQuery, graphql } from "gatsby"

import Layout from "../components/layout"
import ArticlesComponent from "../components/articles"

import "../assets/css/main.css"

const IndexPage = () => (
  <Layout>
    <StaticQuery
      query={graphql`
        query {
          allStrapiArticle {
            edges {
              node {
                strapiId
                title
                category {
                  name
                }
                image {
                  publicURL
                }
              }
            }
          }
        }
      `}
      render={data => (
        <div className="uk-section">
          <div className="uk-container uk-container-large">
            <h1>Strapi blog</h1>
            <ArticlesComponent articles={data.allStrapiArticle.edges} />
          </div>
        </div>
      )}
    />
  </Layout>
)

export default IndexPage
如你所见,这里我们使用了StaticQuery在ArticlesComponent组件中生成了数据。
接下来创建文件components/articles.js
import React from "react"
import Card from "./card"

const Articles = ({ articles }) => {
  const leftArticlesCount = Math.ceil(articles.length / 5)
  const leftArticles = articles.slice(0, leftArticlesCount)
  const rightArticles = articles.slice(leftArticlesCount, articles.length)

  return (
    <div>
      <div className="uk-child-width-1-2" data-uk-grid>
        <div>
          {leftArticles.map((article, i) => {
            return (
              <Card article={article} key={`article__${article.node.strapiId}`} />
            )
          })}
        </div>
        <div>
          <div className="uk-child-width-1-2@m uk-grid-match" data-uk-grid>
            {rightArticles.map((article, i) => {
              return (
                <Card article={article} key={`article__${article.node.strapiId}`} />
              )
            })}
          </div>
        </div>
      </div>
    </div>
  )
}

export default Articles 在这里,我们再一次用了Card这个组件,所以我们继续创建它components/card.js
import React from "react"
import { Link } from "gatsby"

const Card = ({ article }) => {
  return (
    <Link to={`/article/${article.node.strapiId}`} className="uk-link-reset">
      <div className="uk-card uk-card-muted">
        <div className="uk-card-media-top">
          <img
            src={article.node.image.publicURL}
            alt={article.node.image.publicURL}
            height="100"
          />
        </div>
        <div className="uk-card-body">
          <p id="category" className="uk-text-uppercase">
            {article.node.category.name}
          </p>
          <p id="title" className="uk-text-large">
            {article.node.title}
          </p>
        </div>
      </div>
    </Link>
  )
}

export default Card
刷新页面
创建Article页面
到了这一步我们发现所有列表内容都能正常调用了,但是点击博客详细内容都不可用,接下来我们就要解决这个问题,首先修改gatsby根目录gatsby-node.js文件
exports.createPages = async ({ graphql, actions }) => {
  const { createPage } = actions
  const result = await graphql(
    `
      {
        articles: allStrapiArticle {
          edges {
            node {
              strapiId
            }
          }
        }
      }
    `
  )

  if (result.errors) {
    throw result.errors
  }

  // Create blog articles pages.
  const articles = result.data.articles.edges
  articles.forEach((article, index) => {
    createPage({
      path: `/article/${article.node.strapiId}`,
      component: require.resolve("./src/templates/article.js"),
      context: {
        id: article.node.strapiId,
      },
    })
  })
}你可以理解为该文件配置作用为生成了路由规则,作用参数为path: /article/${article.node.strapiId},系统会生成出如下格式的URL地址
- /article/1
- /article/2
- /article/3
- /article/4
在接下来的操作之前我们需要安装两个非常重要的插件:react-markdown 和 react-moment,显而易见一个是markdown语法解释器,而另一个用于时间格式化,执行安装
yarn add react-markdown react-moment moment
前面我们在gatsby-node.js中引入了article component:require.resolve("./src/templates/article.js",现在我们来创建这个文件
src/templates/article.js
import React from "react"
import { graphql } from "gatsby"

import ReactMarkdown from "react-markdown"
import Moment from "react-moment"

import Layout from "../components/layout"

export const query = graphql`
  query ArticleQuery($id: String!) {
    strapiArticle(strapiId: { eq: $id }) {
      strapiId
      title
      content
      published_at
      image {
        publicURL
      }
    }
  }
`

const Article = ({ data }) => {
  const article = data.strapiArticle
  return (
    <Layout title={article.title}>
      <div>
        <div
          id="banner"
          className="uk-height-medium uk-flex uk-flex-center uk-flex-middle uk-background-cover uk-light uk-padding uk-margin"
          data-src={article.image.publicURL}
          data-srcset={article.image.publicURL}
          data-uk-img
        >
          <h1>{article.title}</h1>
        </div>

        <div className="uk-section">
          <div className="uk-container uk-container-small">
            <ReactMarkdown source={article.content} />
            <p>
              <Moment format="MMM Do YYYY">{article.published_at}</Moment>
            </p>
          </div>
        </div>
      </div>
    </Layout>
  )
}

export default Article
记住,每次修改gatsby-node.js我们都要重启服务来查看效果。
创建Category页面
首先处理路由信息,修改gatsby-node.js文件
exports.createPages = async ({ graphql, actions }) => {
  const { createPage } = actions
  const result = await graphql(
    `
      {
        articles: allStrapiArticle {
          edges {
            node {
              strapiId
            }
          }
        }
        categories: allStrapiCategory {
          edges {
            node {
              strapiId
            }
          }
        }
      }
    `
  )

  if (result.errors) {
    throw result.errors
  }

  // Create blog articles pages.
  const articles = result.data.articles.edges
  const categories = result.data.categories.edges

  articles.forEach((article, index) => {
    createPage({
      path: `/article/${article.node.strapiId}`,
      component: require.resolve("./src/templates/article.js"),
      context: {
        id: article.node.strapiId,
      },
    })
  })

  categories.forEach((category, index) => {
    createPage({
      path: `/category/${category.node.strapiId}`,
      component: require.resolve("./src/templates/category.js"),
      context: {
        id: category.node.strapiId,
      },
    })
  })
}和上面处理article的方法一样,这里不做过多解释,接下来创建文件src/templates/category.js
import React from "react"
import { graphql } from "gatsby"

import ArticlesComponent from "../components/articles"
import Layout from "../components/layout"

export const query = graphql`
  query Category($id: String!) {
    articles: allStrapiArticle(filter: { category: { id: { eq: $id } } }) {
      edges {
        node {
          strapiId
          title
          category {
            name
          }
          image {
            publicURL
          }
        }
      }
    }
    category: strapiCategory(strapiId: { eq: $id }) {
      name
    }
  }
`

const Category = ({ data }) => {
  const articles = data.articles.edges
  const category = data.category.name

  return (
    <Layout title={category}>
      <div className="uk-section">
        <div className="uk-container uk-container-large">
          <h1>{category}</h1>
          <ArticlesComponent articles={articles} />
        </div>
      </div>
    </Layout>
  )
}

export default Category 上面我们可以看出,再次使用了ArticlesComponent组件,事实上在index.js文件中我们也用了这个组件,组件复用好处显而易见是可以避免重复写相同的代码提供工作效率。
重启服务,点击分类就可以看到该类目下的内容了